Hügelkultur raised beds are easy if you know-how and have a little patience. I will be implementing hügelkultur raised beds this year on our mountain! It has been over a year and a half since we built our Hügelkultur beds and we love them! I want to provide an update now they have been implemented.
We built a new blogging room where my hydroponics garden once stood. We needed to take down that “garden” and move it. I didn’t want to have all the pipes and pails out front where you drive up to our home. We also had plenty of rotten logs leftover from building the cabin 9 years ago. We have done this method before and know it works well. Perfect time to build a new garden, let’s get started!
Table of Contents or Collapse to Hide
How to Pronounce Hügelkultur and What is It?
First, how to pronounce it. It’s pronounced like Google but hoogle then culture. Let me explain in a nut-shell what hügelkultur actually is. It’s any means of making a raised bed, either with walls or not.
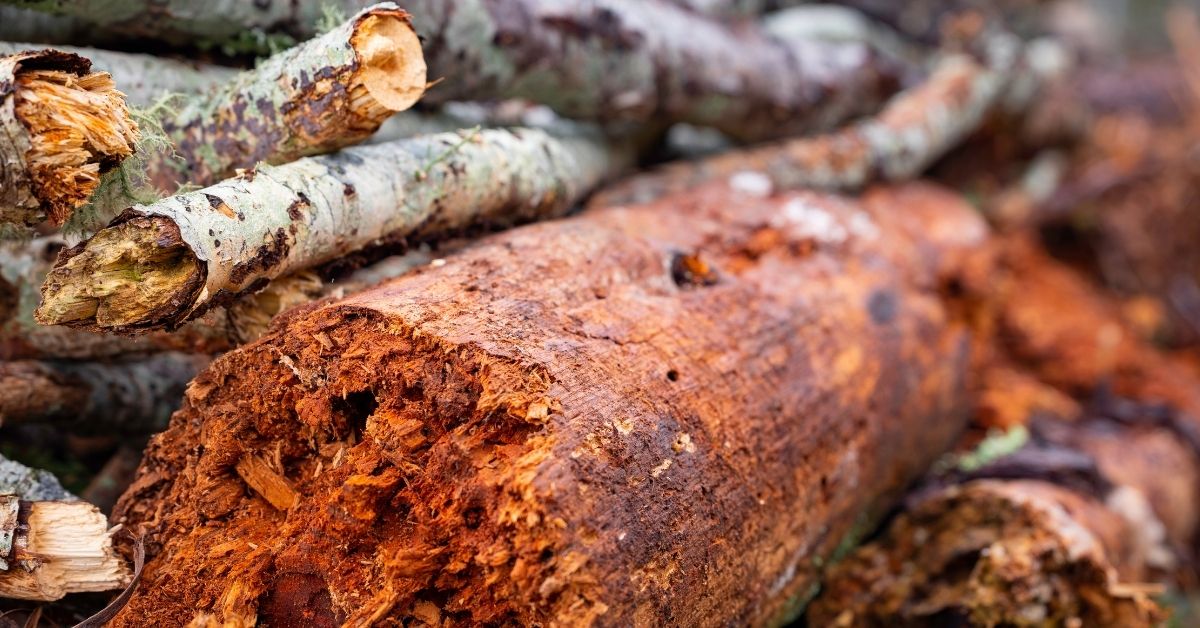
In the bottom layer of the bed, rotten wood and organic elements get placed. Layer on top, compost, and good garden soil. Ensure to wet it thoroughly in-between layers.
This bed will hold in the moisture and when the rotten wood and organic matter breaks down, this will give the soil more nutrients than when it started.
What Goes in a Hügelkultur?
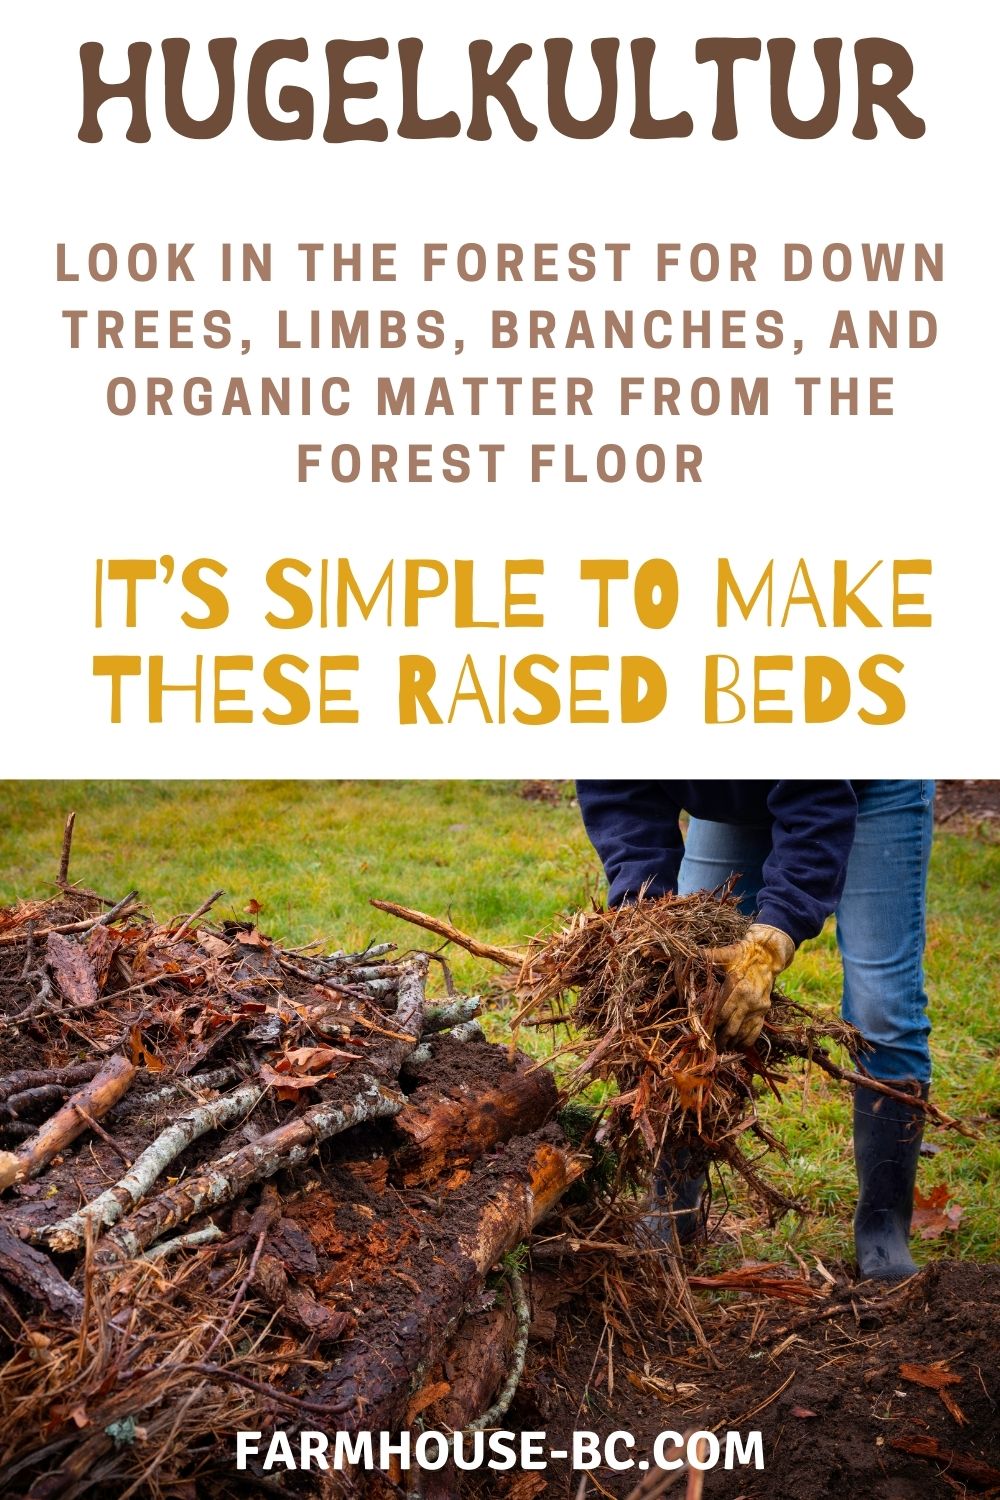
Look in the forest for down trees, (be mindful of “widow makers”), limbs, branches, and organic matter from the forest floor. It’s simple to make these raised beds.
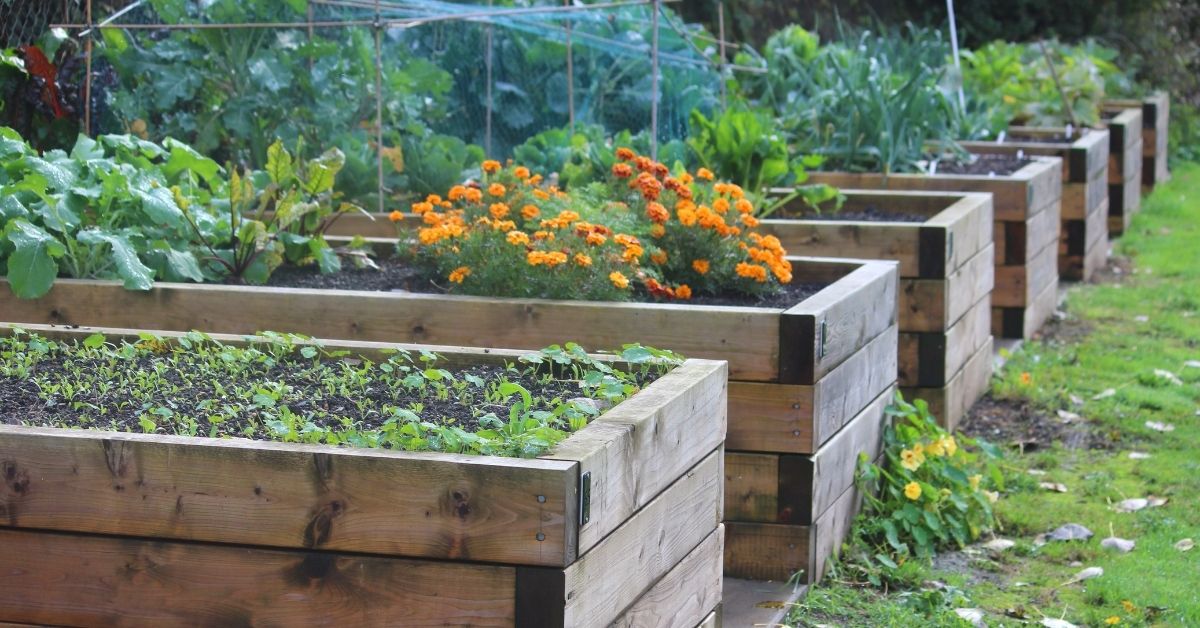
Typically, these types of raised beds are huge mounds that plants get planted on the mound of soil with the key components underneath as mentioned above. I have opted to construct mine the same but have a level surface to plant my vegetables and to use concrete blocks for the walls.
These days, people get smarter and more creative. Some of them create a new way to prepare a medium for planting or gardening. Sometimes it’s the only means of having a garden besides container gardening. That is our situation on the mountain ridge with rocks and ledges and no yard.
With hügelkultur, the difference is that you do not dig in the earth but you create the medium from natural resources. All the materials that you need are there in nature. You do not need to buy it. Mother earth has provided it for us all. The trend is spreading throughout the world. This new way of planting is very simple yet effective for good.
Who Can Make a Hügelkultur?
Everyone can make it very easily. Kids, teenagers, adults even older people can make Hügelkultur with their bare hands and natural resources around them. Students from kindergarten until the high school years can make Hügelkultur too in their school environment. It would be a great learning experience for them to understand how to re-use, recycle and grow their food.
If you want to make one, prepare a lot of trunks, twigs, and stumps from used or abandoned trees. Fertile soil is also needed in this making. You can read my blog, Making Compost Naturally into Garden Soil for more information on how to make compost that is beneficial to raised beds.
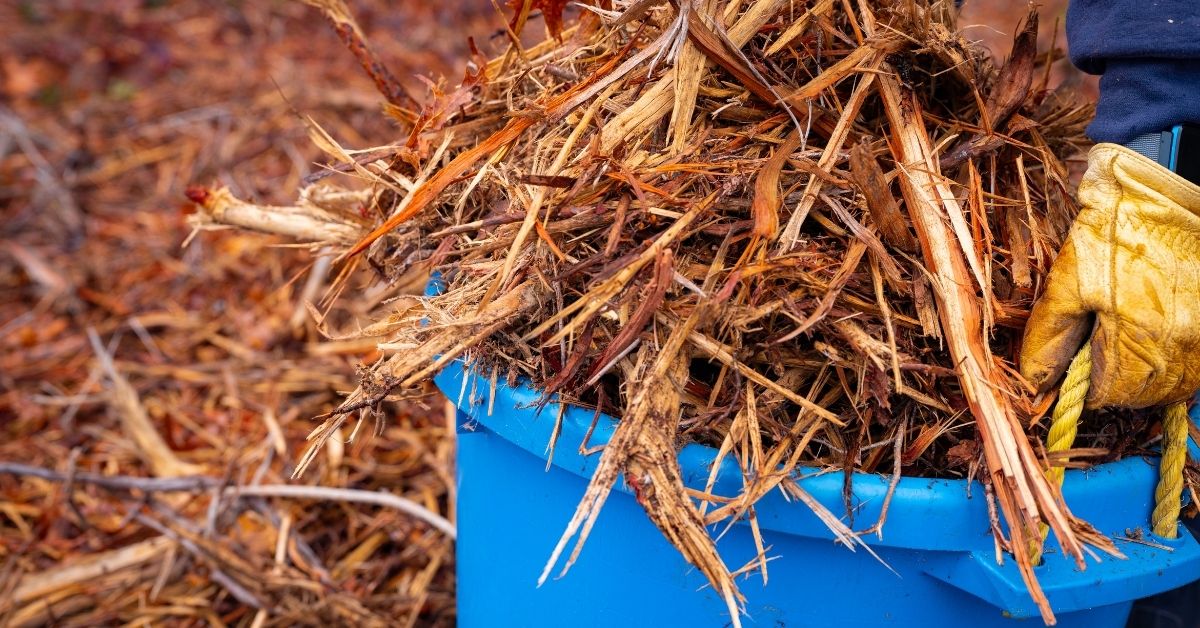
Prepare grass, wheat straw, green leaves of any plants, organic fertilizer, and enough water. Ensure not to use pressure-treated wood or lumber. Also, do not use anything that had pesticides or weeds in it. (note: hay contains seeds, it’s best not to use if possible).
How to Create a Hügelkultur Raised Bed?

How to Create a Hügelkultur Raised Bed
Total Time: 1 hour
Step 1
Place tree trunks, twigs, and stumps in one place horizontally, rotten ones are the best
Step 2
Next, place green leave, grass, and wheat straw on the top
Step 3
Cover it all up with fertile soil
Step 4
Add the organic fertilizer (optional)
Step 5
Water well every day
Step 6
Do not let it dry out
Supply:
- Gloves
- Eye protection
Tools:
- Hand saw
- Shovel
Materials: Tree trunks, Twigs, Stumps
Visit my post on Vermiculite vs Perlite post for more information on how to use them and their benefits.
Does Hügelkultur Really Work?
Of course, it works. It does work and really well too! After 1 year, the hügelkultur will look like a new garden. The ingredients that you place in it acts as a natural fertilizer.
You can add additional organic fertilizer if you want even though it is not necessary. Many people, gardeners, and farmers love this new way to grow plants.
Using Blocks or Bricks for a Raised Bed
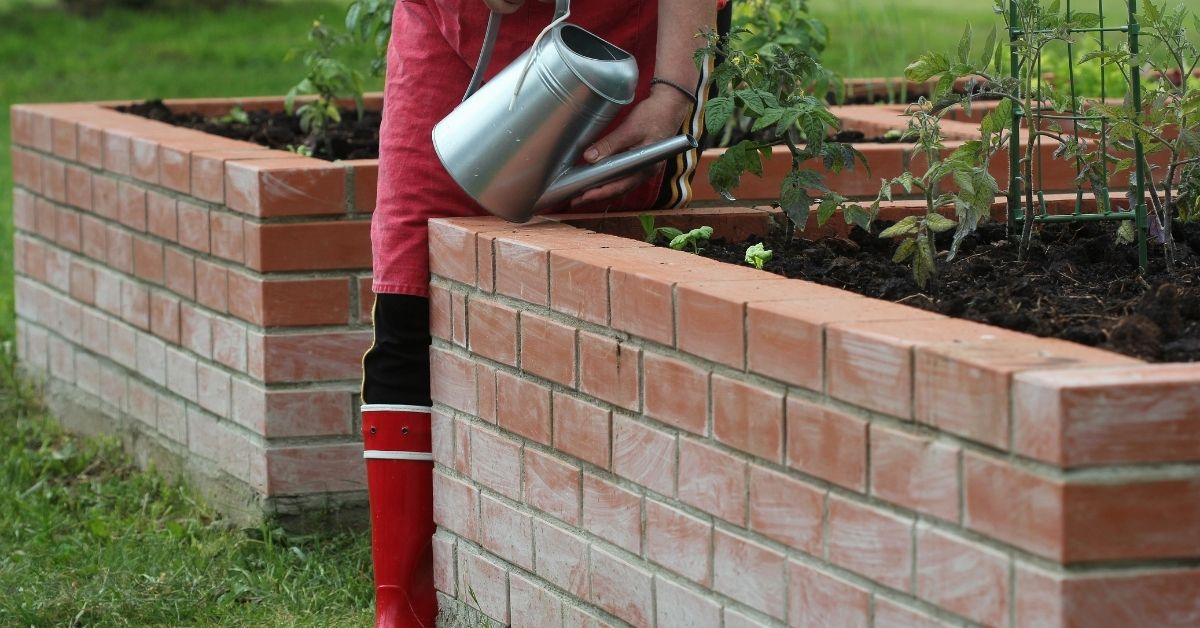
Actually, it does not matter whether you make the raised bed walls of hügelkultur from natural resources or from concrete blocks. The point is that you place enough stumps, branches, twigs, wheat straw, grass, leaves, and fertile soil in one place to make the raised bed. Again, the key is to use as many rotten components as possible to speed up the process.
I wish we would have built our raised beds during the winter so they could have settled and composed down more, but I didn’t know at the time I was going to be building them.
Ideally, you should wait at least 3-4 months to plant in the raised bed, but it is not necessary. The soil will be good and fertile from the compost and soil you will be adding on the final layer on top.
Termites in the Raised Beds

Termites are good to hasten the rotting process in the stumps, twigs, branches, and logs. We need them to decompose the old wood. However, if there are no termites, you will still be able to have the process work. Temperature, humidity, water, and air will rot them. After the medium has rotten perfectly, you will be able to plant successfully every year.
The life span on an average size hügelkultur is approximately 5-7 years. At which time, you should scrape off the top layer, start a new bottom layer and recycle the topsoil to which new components should be amended back into the top layer.
Steps to Construct Raised Beds
Actual planting size bed: 44″x92″ inches of planting
- Pour a 6-inch concrete pad
- Build a wall out of concrete blocks (block size-4x8x16)
- Use rotten logs and composted log matter for 1/3 of the bed
- Water thoroughly
- The remainder of the bed use mushroom compost, and garden run (from the local nursery)
- Sprinkle a good layer of coffee grounds from McDonald’s and Starbucks over the beds and rake in well
- Plant vegetables
- Place two Oyas in the bed
- Top with cedar shavings (from the local nursery)
- Completely soaked the bed with water
- Water every day and fill the Oyas
Finishing the Raised Beds
We have plenty of lime-wash leftover from the brick walls in the blogging room. I think that will look nice and it will be much easier to spray off outside! What a mess it was inside the house.
If you have never grown a garden and want to know where to get started, read my post 12 Gardening Tips for Beginners on getting started gardening. Whether you create a hügelkultur raised bed, a container garden, or just one plant on the patio, it’s a wonderful thing to grow your own food! The main thing just grows something, the rewards are so worth it!
Don’t forget, your new raised bed is the PERFECT place to attract the beautiful butterflies around your house! If you don’t know how to do that, no worries! I have taken the time to show you How to Attract More Butterflies to Your Garden!
In Conclusion
We are building several more throughout the summer. I want a bed that is specific to my perennials such as rhubarb and blueberry bushes. Right now, one whole bed is all tomatoes, Roma, specifically. I will rotate the tomatoes out next year with other vegetables in their place.
After the first year, if the bed was watered well, you will not have to water it so often. The logs are like a sponge wicking up the water and holding it in. This is true if using the bed as a perennial garden. I tend to plant mostly annuals and they do require regular watering.
Let me know what kind of gardening you do at your home; we’d love to hear from you. If you’d like to see what Wiki has to say on hügelkulturs, you can read all about it Hügelkultur.
More Useful Garden Links
Vertical Gardens for Small Spaces is also beneficial, and gives you the opportunity to plant a garden with minimal space needed!
If you checked out our post about naturally composting linked above and don’t know what you can compost, Many Incredible Uses for Eggshells will help start some ideas!
In my own garden, I only like to use my Manure Tea Recipe in my Hügelkultur Raised Beds, container gardening planters (which you can find in my Guide to Container Gardening post), and even in the Oya and Ollas that get the liquid fertilizer. I do like to switch out the manure tea every other week with my Fish Emulsion Fertilizer (read more about that).
Need some ideas on what to grow this year in your garden? 11 Great Plants to Regrow From Cutting is all you need!
Now that you’ve grown your garden, a couple of key factors to make your bounty last longer that would be beneficial would be Methods of Drying Herbs and Dehydrate Food Naturally Using a Dehydrator. These methods allow you to keep what you have grown all year round for your enjoyment!
Shop Here:
We are a participant with the Amazon Services LLC Associates Program, an affiliate advertising program designed to provide a means for us to earn fees by linking to Amazon.com and affiliated sites.
You will not incur extra fees or charges for using the links. We only recommend items we believe in and have tried. If I personally make or sell an item, I will mention this in the post for each item.
Visit our Amazon Storefront!
Gardeners Gloves can be found on Amazon
Gardening Kit can be found on Amazon
ph Meter can be found on Amazon
Vermiculite can be found on Amazon
Perlite can be found on Amazon
Please subscribe:
Thank you for stopping by and reading our blog. If you haven’t signed up for our newsletter, please take a moment and do so. We will not sell, share, or use your contact information. We are also ad-free and will not inundate you with unnecessary emails. Click the button below to join our community and receive our newsletter.
Please see the footer for FBC Disclaimer, Privacy Policy, Terms and Conditions.
PIN IT:
Pingback: Easy Container Gardening Tips For Beginners ⋆ Farmhouse-bc
Pingback: Fish Emulsion Fertilizer, How To Make And Use! ⋆ Farmhouse-bc
Pingback: Attract More Butterflies In 10 Easy Tips! ⋆ Farmhouse-bc
Pingback: Knowing The Difference Between Vermiculite And Perlite?
Pingback: Elderberry Vs Pokeberry-the Shocking Difference Of The 2! ⋆ Farmhouse-bc
Pingback: Hanging Flower Basket ⋆ Farmhouse-bc
Pingback: Oyas And Ollas Made Easy For Your Garden ⋆ Farmhouse-bc
Pingback: Seed Organization In 6 Amazingly Simple Ways ⋆ Farmhouse-bc
Pingback: 5 Shocking Reasons To Buy Dollar Tree Seeds ⋆ Farmhouse-bc
Pingback: How To Make Easy Manure Tea In 2 Ways ⋆ Farmhouse-bc
Pingback: Gardening Tips for beginners ⋆ Farmhouse-bc
Pingback: Growing millet for birds - Farmhouse-bc
Pingback: The best 12 mosquito repellent plants - Farmhouse Basic Collection.
Hello, i feel that i saw you visited my weblog so i got here to “go back the desire”.I’m trying to find issues to improve my website!I assume its good enough to use a few of your ideas!!
I believe other website proprietors should take this web site as an model, very clean and superb user friendly design and style.
Thanks for the kind words Jenn! I opted for a block to contain it for a few reasons. It’s made locally, (support local business), it will never rot, it’s a perfect height for my back and we can either lime-wash it or use local river rocks we get for free from the farmer’s field down the road. I could have used wide blocks and actually planted in the holes but I wanted the narrow ones, we will be putting a flat ledge all the way around the top. We are building several more this summer. Thanks for stopping by, I appreciate you!
Such a good idea! We did this in a pile a few years ago after reading a book. It was such an ugly mess that I said…no more. I love the idea of containing it in a bed, so much prettier!!