Shockingly whitewash brick with 3 ingredients and not use paint? That sounds intriguing! I knew I wanted an “NYC loft look” incorporated into my blogging room. I suppose, if you live in the country you may want a bit of the city and I am sure when living in the city, you wouldn’t mind a little country in your style?
The history of whitewash or limewash is very fascinating, but I won’t be doing a post on that today, maybe someday though! Country Living Magazine, which I love reading has a great post on why farmhouses were always white back in the day. You can find that post The Very Practical Reason Farmhouses Are Usually White.
Table of Contents or Collapse to Hide
What is the Difference Between Whitewash and Limewash?
Technically the words are used interchangeably but that doesn’t mean they are the same meaning. Originally, whitewash was using watered-down paint and practically “dry brushing” it on to make the medium appear vintage.
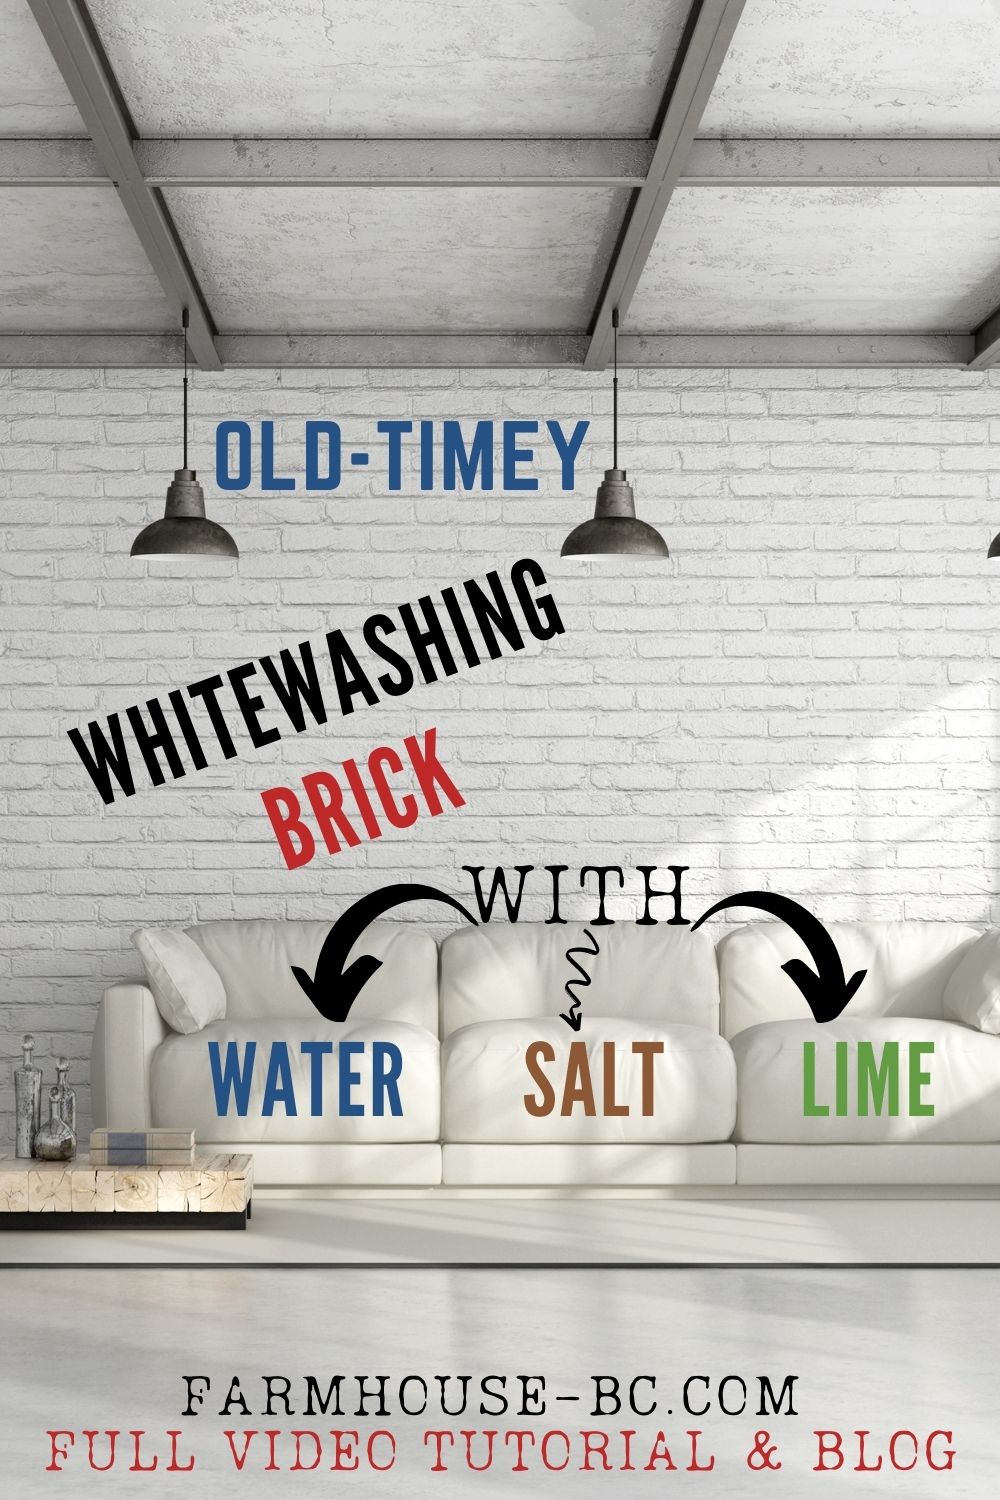
Limewash is what it sounds like, using hydrated lime, water, and salt. Some others add molasses and such but I am not sure why besides the high cost and insects it would attract.
Creating Faux Lathing Strips On Walls
Before we began this project I wanted to add a little old-style to the walls in my blogging room by adding faux lathing strips and stucco. It’s important to pre-plan this other project before starting your whitewash project.
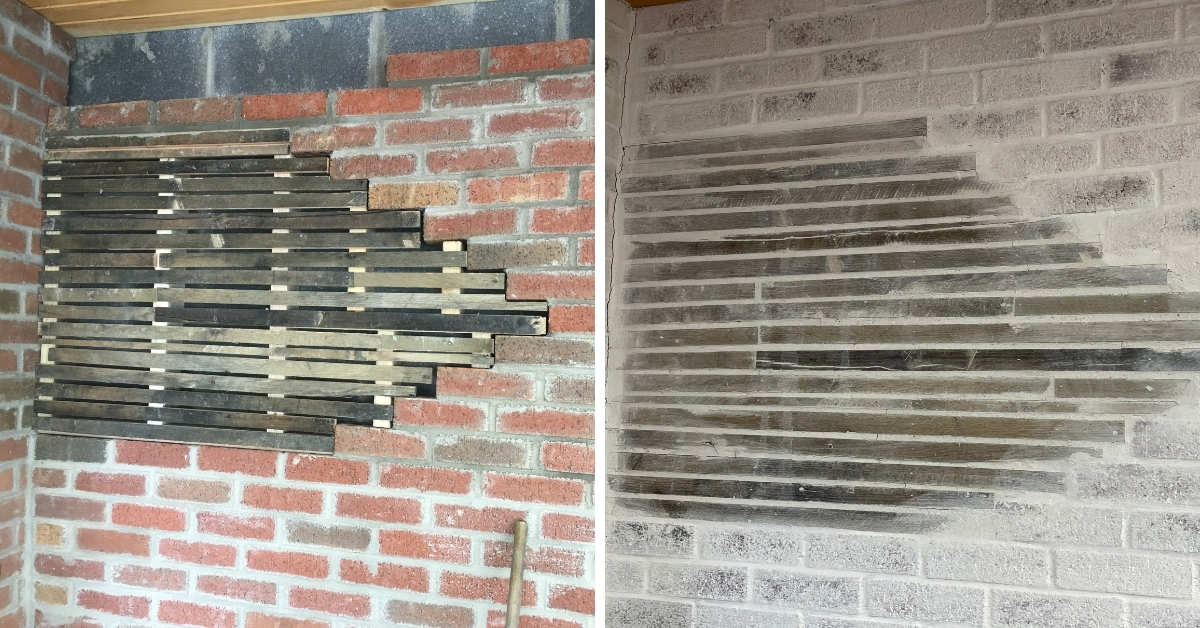
Here is a before and after shot of the faux lathing strips completed. We had several old pallets we got free from the local plumbing store and we used them for the “faux lathing strips”.
We ripped the pallet boards into random widths and lengths. Then the strips were nailed onto 2×4’s that were framed into the brickwork as nailers. We also decided to do another wall with the same technique above the header over the store-front windows.
As you can see via the second image, we had to cover the lathing strips with surface bonding cement. Watch the video for Lathing and Plastering Walls for a Rustic or Modern Look!
You can use your personal preference where they go and the shape of the lathing strips. This technique is a demonstration of how back in the day how they repaired a damaged or crumbling wall. Be mindful of what will be placed on the wall. Don’t pick a spot that you intend to hang a picture to cover the strips.
Materials for Whitewashing Brick
You may purchase the limewash already made, but why? You can do this yourself at half the cost!
Print the Whitewash Materials List
- 4 pounds iodized salt
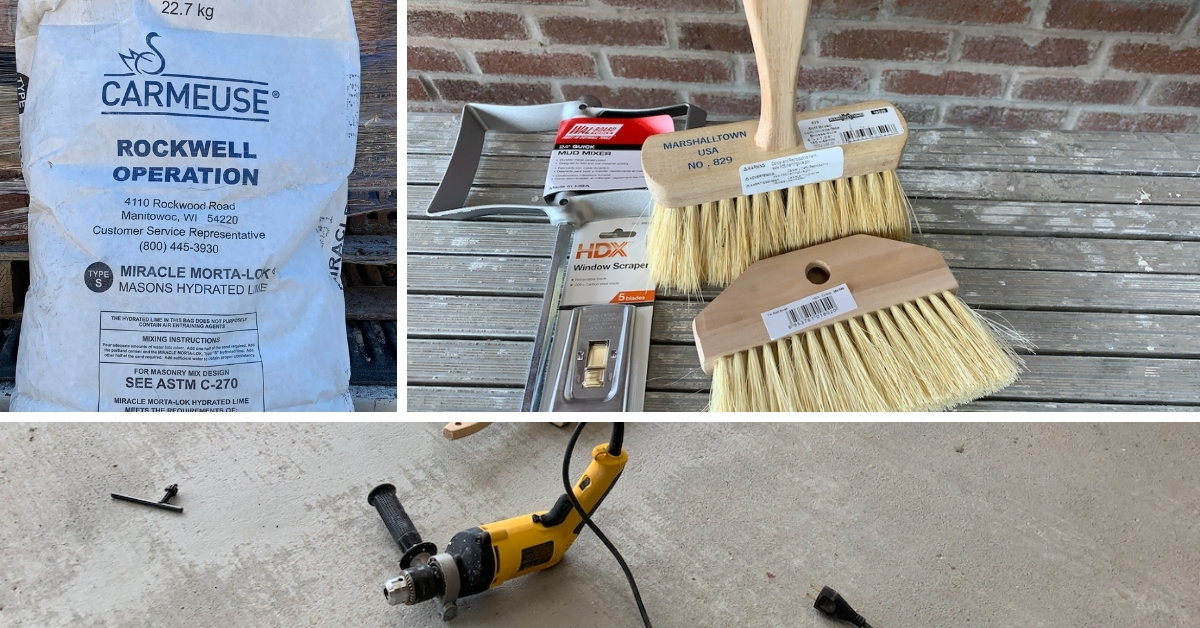
- 25 pounds hydrated lime-Type S
- Electric drill (a battery one will not last-our first one burned up while mixing the lime and water)
- Mason brushes (it’s a cheaper version of a stucco brush)
- Acid brushes (works well for corners since it’s narrower)
- Drywall paddles or called mud mixer
- Window scraper (optional for windows to remove after washing)
- Painter’s tape (optional)
- 5-gallon bucket with a lid
- Rags
- Water hose or pump sprayer
- A color pigment may be added with the dry ingredients
- We chose no pigments-we like the white color
- If working on any floor besides concrete, it is imperative to lay down a protective barrier such as 6-mil plastic
- A mop or wet/dry shop vac is needed
- PPE’s:
- Apron
- Workboots
- Safety glasses
- Dust mask
- Gloves-nitrile or latex
- Ladders
- Scaffolding
How to Make Lime Whitewash Mix
How to Make Lime Whitewash Mix
Total Time: 6 hours
Step 1
Add half of the lime (10 pounds) to the 5-gallon bucket
Step 2
Add 2 pounds of salt to the 5-gallon bucket and lime
Step 3
Blend the dry ingredients
Step 4
Add the other half of the lime (10 pounds) to the 5-gallon bucket
Step 5
Add 2 pounds of salt to the 5-gallon bucket and lime
Step 6
Add water slowly (until the mixture is wet)
Step 7
Consistency should be of a thick pancake mix-not watery
Step 8
Let sit for 3 or more hours to set (trust me, this is key)!
Step 9
Starting with one wall at a time, brush loose debris-use mason brush
Step 10
Lightly dampen brick with water (spray bottle or hose)
Step 11
Use a mason’s brush to apply the lime whitewash mixture (until you get total coverage)
Step 12
Start with a light, even spray of water to expose the color underneath
Step 13
Blend water
Step 14
If the blend looks choppy or streaky, reapply more, wait and try again
Step 15
It is best to do the whole entire room as the colors will change as it starts to dry
Estimated Cost: 150.00 USD
Supply:
- Painter’s tape
- Rags
- Water hose or pump sprayer
- 6 Mil roll of plastic
Tools:
- Electric drill (a battery one will not last-trust me!)
- Mason brushes (it’s a cheaper version of a stucco brush)
- Acid brushes (works well for corners since it’s narrower)
- Drywall paddles or called mud mixer
- Window scraper (optional for windows)
- A mop or wet/dry shop vac is needed
Materials: 25 pounds hydrated lime-Type S, 4 pounds iodized salt, 5-gallon bucket with a lid
How to Prep Brick for Whitewashing
Blend all the dry ingredients and pigments if applicable at this time. In this video, we only used lime, water, and salt. We opted out of any color.
Add the water slowly, mixing well until a pancake batter consistency is achieved. Let this mixture sit for 3 hours or more. Trust me when I say, this is a very crucial step to a well-finished project.
Prep walls with water, either using a hose or pump spray bottle. Protect surfaces from excess water and limewash.
It is recommended to work on one wall at a time. If you want a look of “wash” and not a white painted wall, one wall at a time is recommended. A 30-minute wall time window is best.
How to Whitewash Brick Using Lime Video Tutorial
Apply the limewash using a good, even coat. Only do one wall at a time. Basically, work in a 30-minute window time-frame. Any longer than that, you may not get a good color exposure. Limewash is not like paint, you are not trying to cover every crack and crevice. An added benefit of using the limewash can touch up at any time. As you can tell in the video, it will be messy, wear old clothes and protect all surfaces.
When doing research on limewash, we discovered there are many instructions, methods, and recipes. We decided to combine some and make our own version of limewashing. After some trial and error, we feel we have found the sweet spot that works for us.
This is was our first-time limewashing brick. As you can tell, by changing techniques, doing touch-ups and blending is what we felt worked for us. Please feel free to adapt and add your own technique! Who knows, you may like that even better!
Wait Time Before Beginning to Use the Whitewash
We found the first wall, not to our liking. While continuing the other walls, we added more wash to the streaky and blotchy areas. Using water again to remove until the desired look.
As we started the second wall, we realized how important waiting the 3 hours or more was. We initially started applying the wash within the first hour of mixing. We noticed the limewash was easier to apply and the look of the finish was more appealing. Once the mix was mixed and set for 3 hours or longer.
Exposing the Bricks when Whitewashing
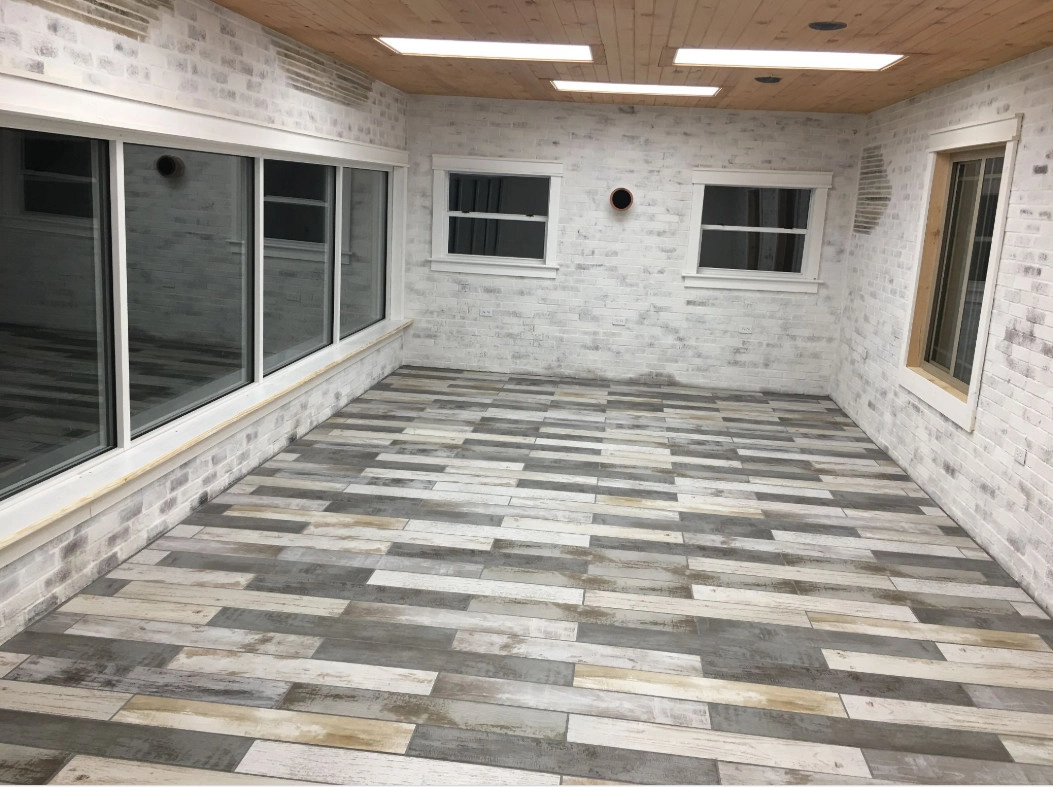
Now the fun begins. How much exposure of the brick do you hope to see? If you want to see mostly brick then you will need to remove most of the limewash. If you want to leave it mostly white as we have then you’ll only need to remove some limewash.
The procedure to remove a lot or even a little is the same. Start by using a spray bottle at various distances from the wall to get a feel of what the end-product will be. Using a hose with a spray mister attached, try blending in larger areas. We were very fortunate that we had concrete floors and it did not matter if the floor got wet. The hose wasn’t working well, it was leaving streaks and lines. I decided to use the water bottle around the smaller areas where the hose made it difficult to get to. Later, I used the hose to blend the exposed areas.
Note: when the walls dry, more of the white pigment will come back stronger. By the time you are finished, you’ll be a pro at the next project!
This process is adaptable to what or how much brick color is exposed. No further actions are required to seal the bricks. This limewash process, even on the outside of homes, will last decades. It is very easy to touch-up any spots that may have been missed or too much wash removed.
Curing Time for Whitewashed Brick
It is recommended to let the brick mortar cure for at least a week before applying the whitewash on a freshly laid brick wall.
To store the leftover lime whitewash is easy, just place a lid on the bucket and keep it out of the sun and the freezing temperature. It should last a good month or more. Keep out of pets and children!
Shop Here
We are a participant with the Amazon Services LLC Associates Program, an affiliate advertising program designed to provide a means for us to earn fees by linking to Amazon.com and affiliated sites.
You will not incur extra fees or charges for using the links. We only recommend items we believe in and have tried. If I personally make or sell an item, I will mention this in the post for each item.
Click on the Bar of Dish Soap to Visit Our Amazon Storefront!
Essential Whitewash Materials Needed
Optional Whitewash Materials
Thank you! I’ve been trying to wrap my mind around how I will be lime-washing the entire exterior of my 1960’s brick ranch. There is just soo much information out there it is overwhelming. I really appreciate your concise techniques! After a few months of dreading getting started, I am currently mixing my wash based on your advice! Whew… here we go!
I would try BEHR Premium from Home Depot, concrete, brick, & tile, wet-look sealer. The one we have is Hi-Gloss No 985. Let me know how it turns out and what you used. Thank you so much for commenting, I appreciate that 🙂
I limewashed a brick hearth. I would like to seal it with a “wet look”. Any suggestions on what to use?
Thank you so much for taking the time to comment, I appreciate the feedback 🙂 I know you can do it! If I can, anyone can LOL. I would love to see your project completed. How exciting, I am sure it will be beautiful.
Looked at a LOT of blog posts and videos on limewashing. Thank YOU for such a complete and thorough explanation of the process. I’ll be tackling the exterior bricks on the front of my house using your suggestions and I feel confident I will be successful. Main point I learned from many others – do NOT try spraying on limewash. You must do it by hand so just get it done instead of wasting time by trying to save time!
Informative post, thank you!
I’m looking to lighten up my wood and brick interior and sounds like lime wash is just the (inexpensive and breathable) ticket. What is the salt’s purpose in the mix? Though I know it can easily be touched up, I’ve read the lime can rub off if you rub up against it, have you experienced this? Thank you again for the recipe and post.
Pingback: New DIY Blogging Room Reveal - Farmhouse Basic Collection.
Thanks, Elise, I am glad I am patient, it took one year in the making 🙂 Thanks for stopping by and commenting, I appreciate the support 🙂
Thanks, Sylvia! I can’t take all the credit, I sometimes go with the easiest and longest return route lol 🙂 I appreciate you for stopping by and commenting 🙂
Thanks, Jenn, it’ll be a while before I get it just “right” lol but it’s a start, thanks so much for commenting 🙂
Thanks, Jen for stopping by and supporting my blog, I appreciate you! 🙂
This is beautiful! Thank you for sharing!
Good job on the video! This is a great post! Very thorough! I sure like the finished look!
This is so cool! You always share the neatest projects. I had no idea how functional whitewash is and that it’s more than just aesthetic. Love it.
This turned out absolutely incredible! Wow! I love the look of a NY loft apartment as well! Great job!
It’s super easy and it doesn’t require paint touch-up, years later 🙂 thanks Katie for stopping by and commenting.
I think this looks great!! I have an ugly brick fireplace in our rental house that could definitely use this!
Thank you Emily for taking the time to reply 🙂
Thanks for the great tips!