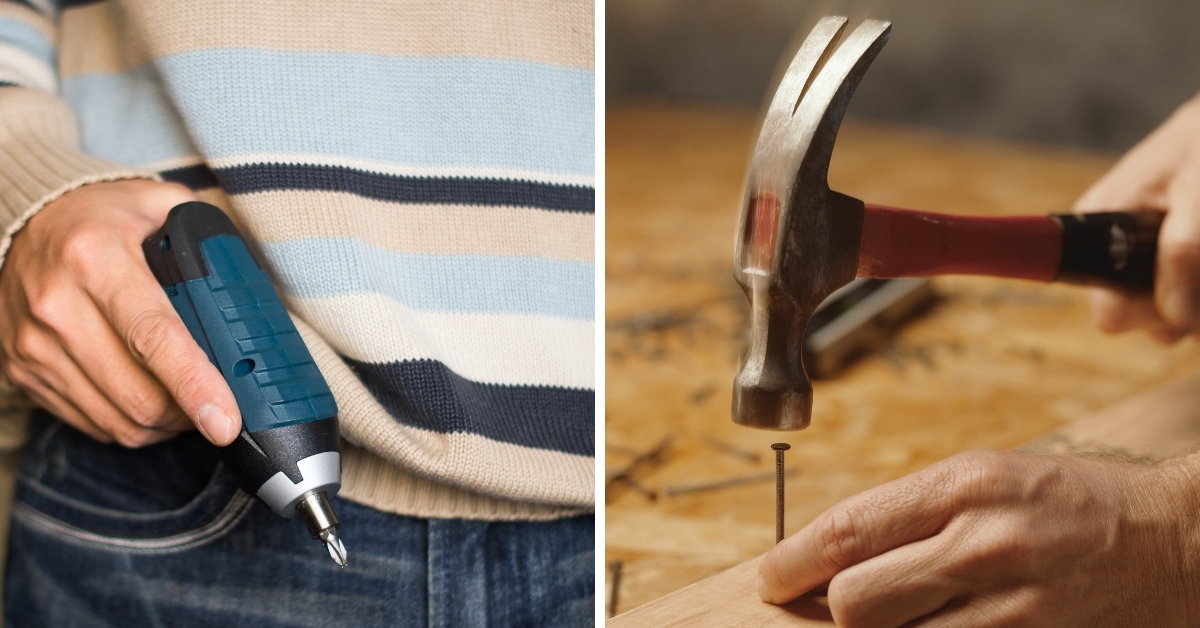
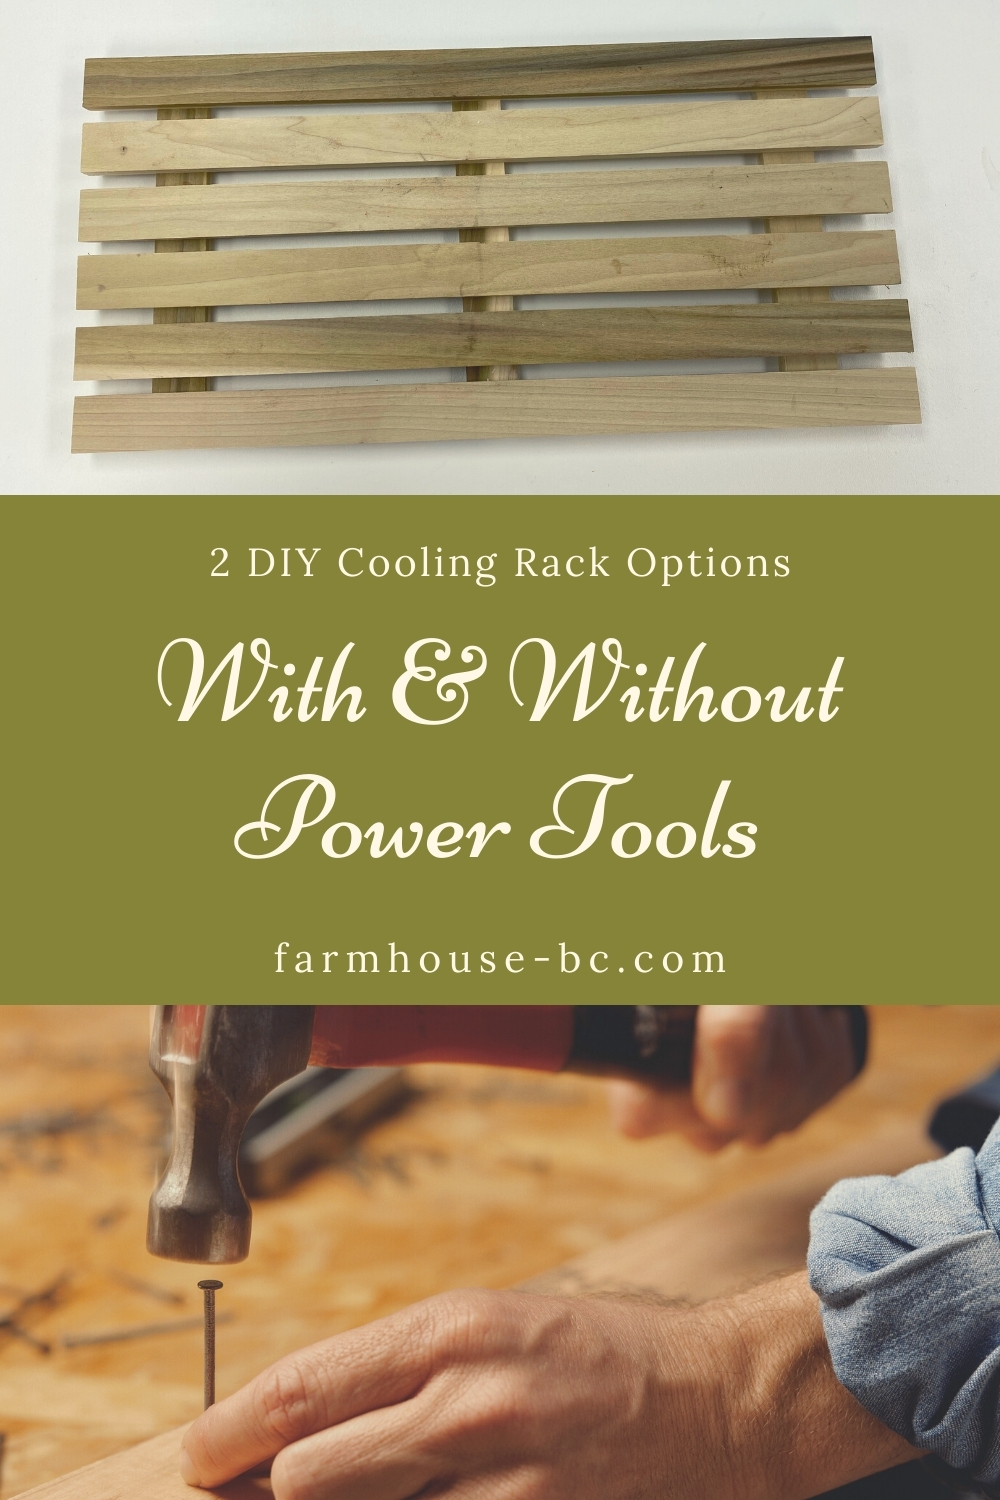
Two free DIY cooling rack options you can make yourself! They can be made with two options, one with and without power tools. It’s so much fun to make your own canning and cooling rack that can be used for years and years. I will show you how to make both of these racks with different options.
One will be using power tools and one without using any power tools. Did you know that both Home Depot and Lowe’s have a cutting station where they will cut your lumber for free? Some stores may charge a small fee for more than 2 cuts.
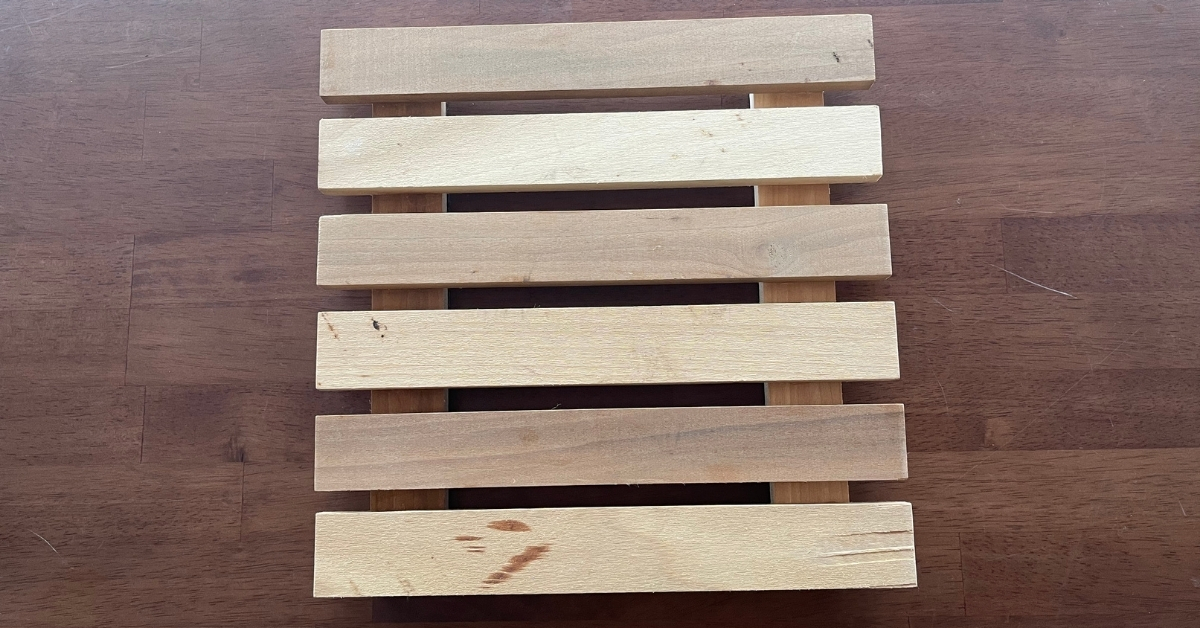
The size of the cooling rack in this tutorial will be 12″x24″ but you may alter the size to fit your needs. Making a smaller size can be used as a pot trivet.
Table of Contents or Collapse to Hide
Project #1 Cooling Rack with Power Tools
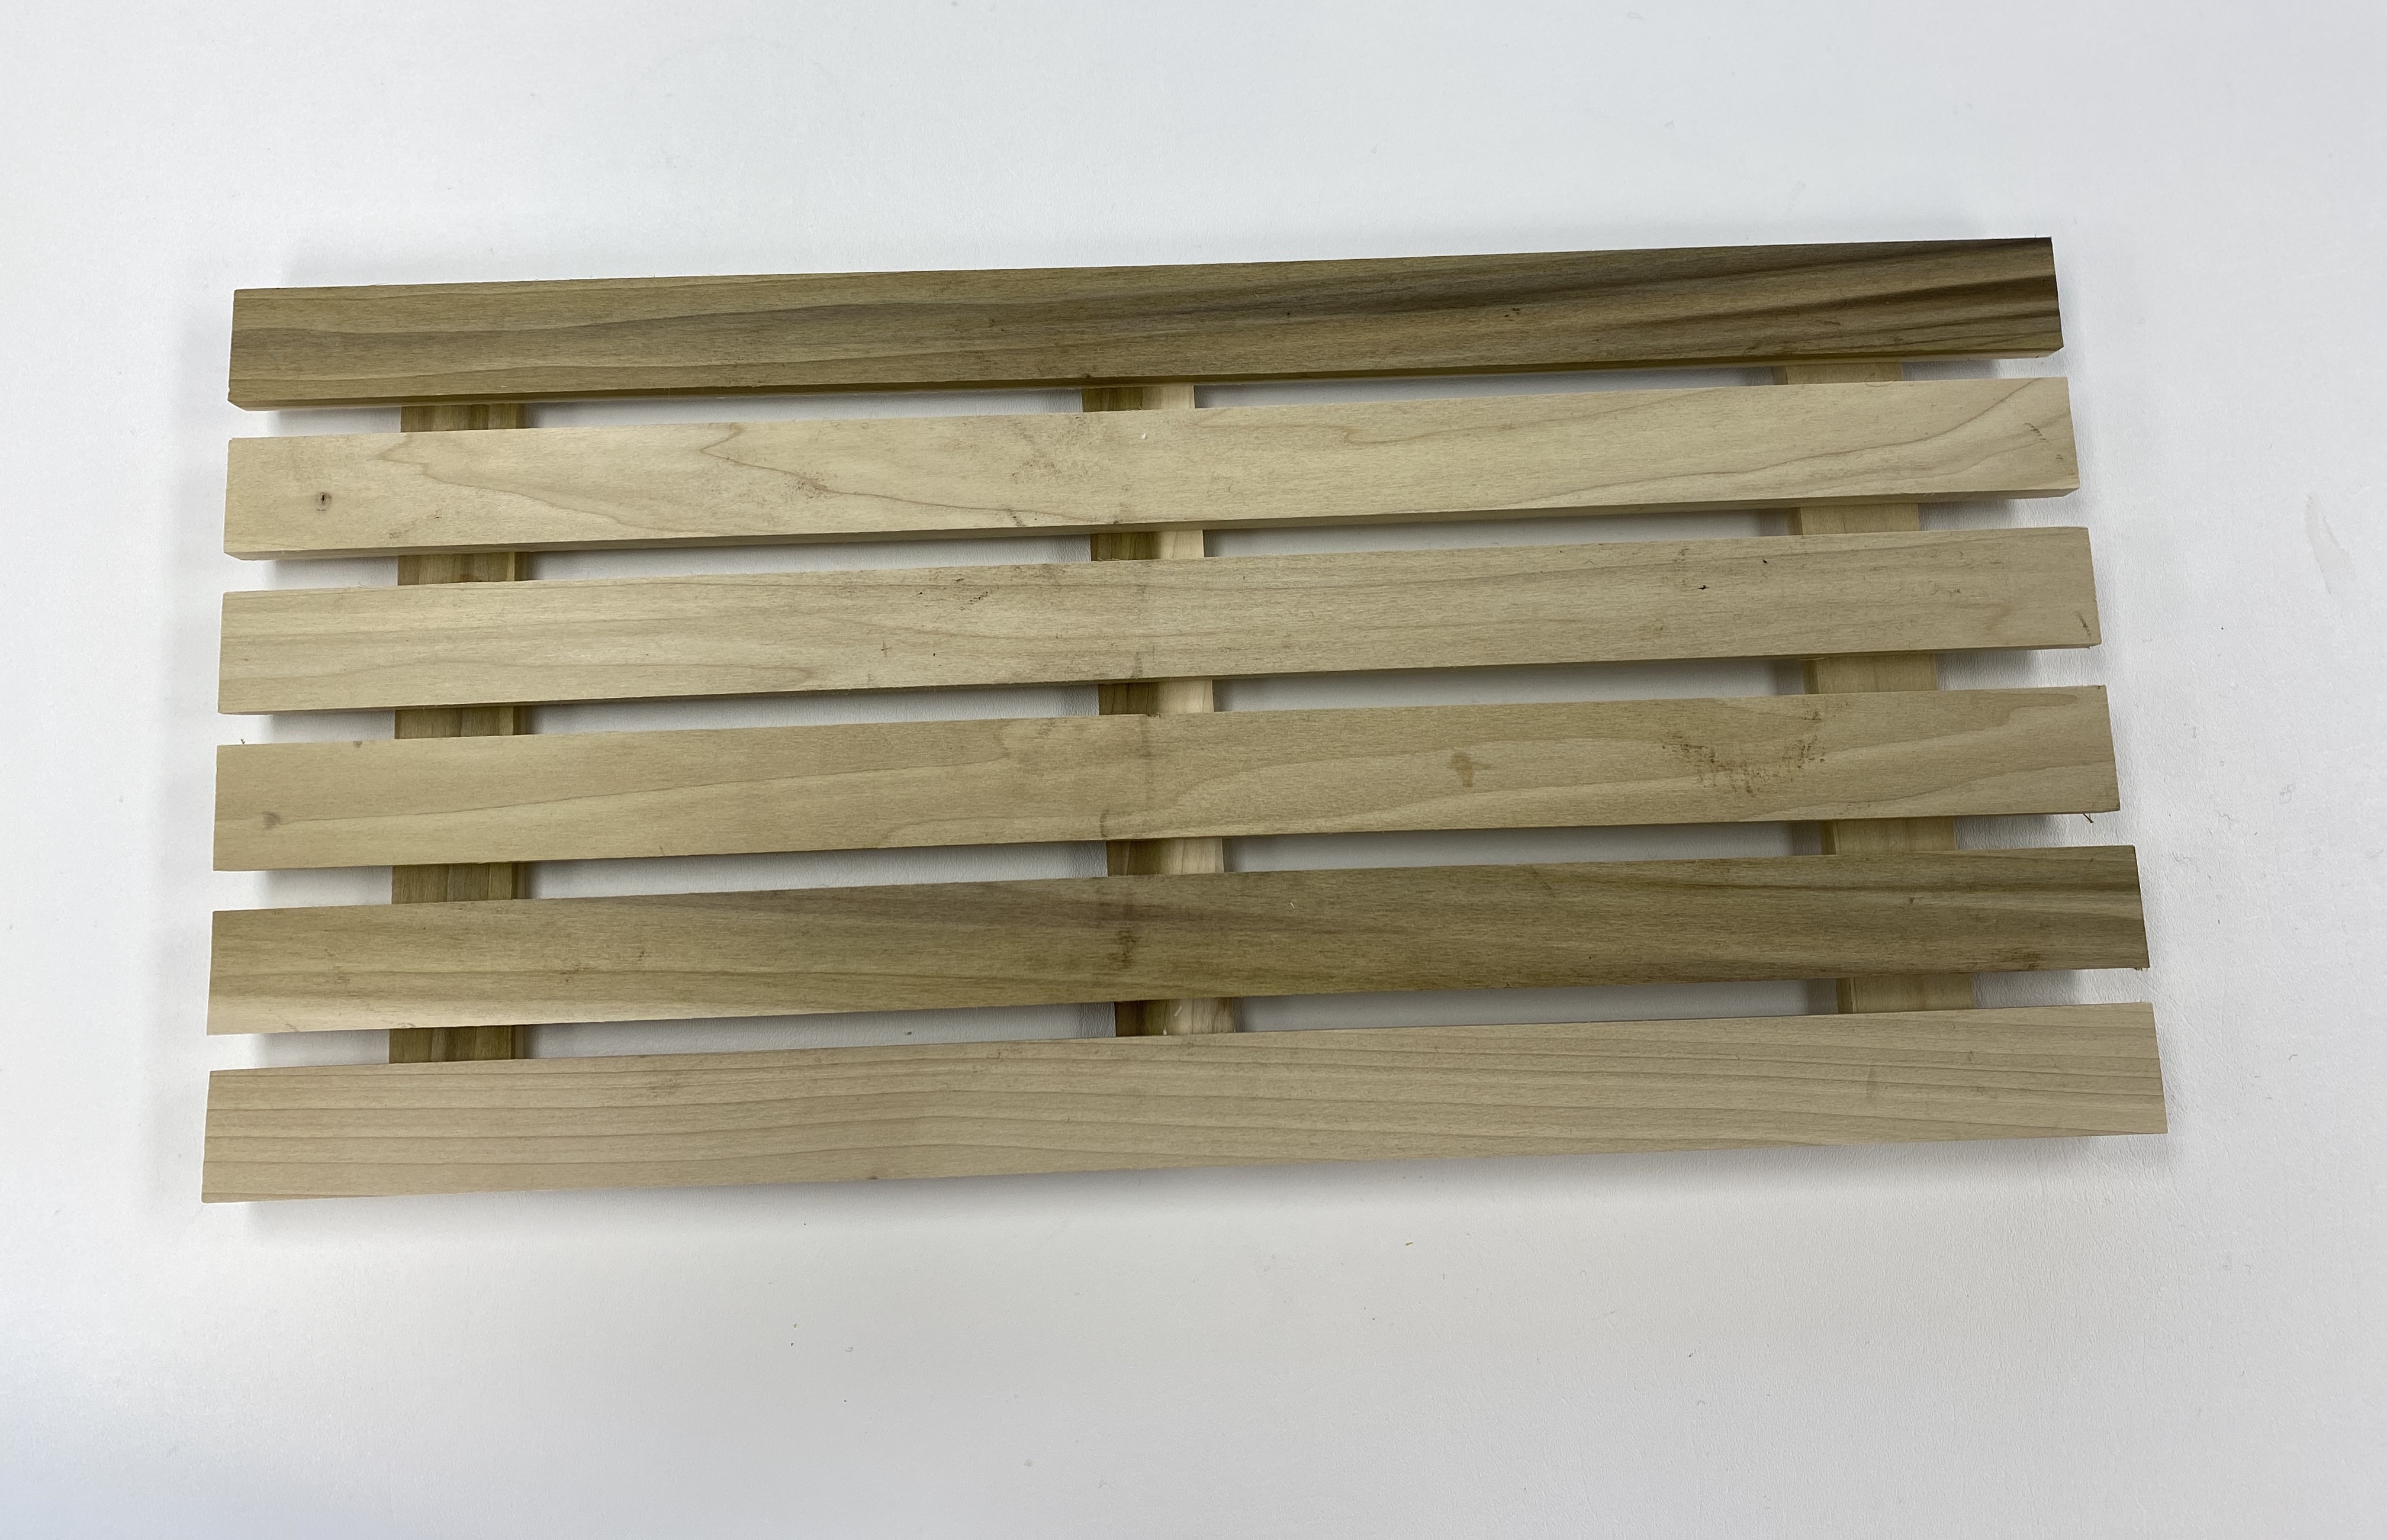
For this project, I purchased my poplar wood from the Home Depot and cut them all myself using a miter saw. To fasten them down, I used an air-stapler and compressor. Poplar is another product made in the USA!
Material List for the Cooling Rack
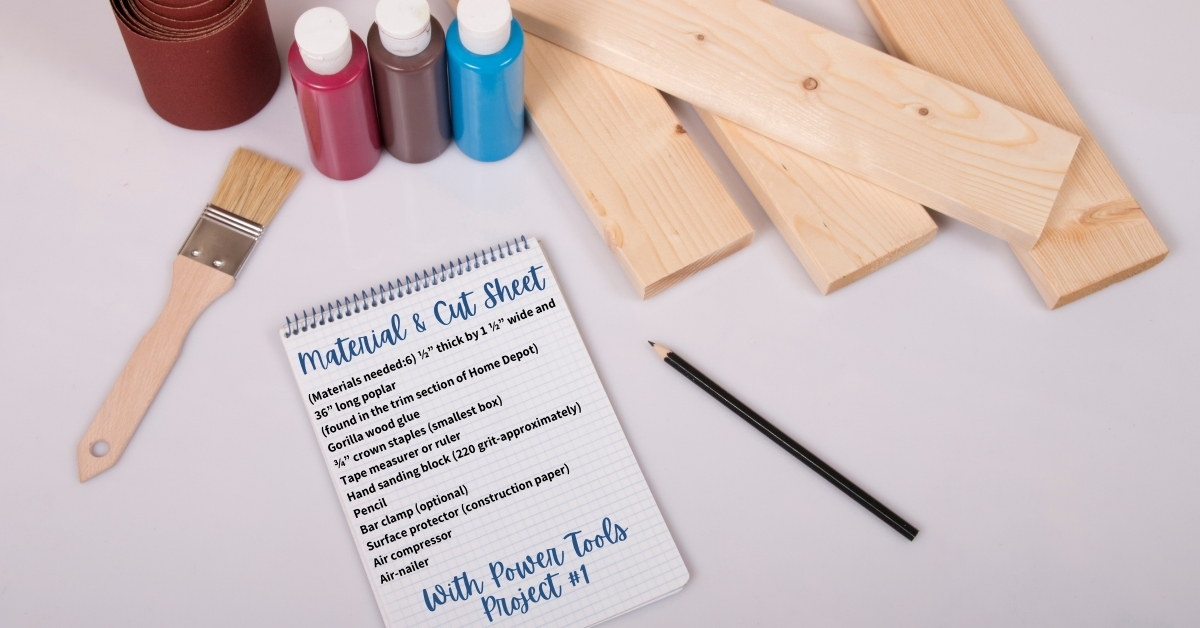
- (Materials needed:6) ½” thick by 1 ½” wide and 36” long poplar (found in the trim section of Home Depot)
- Gorilla wood glue
- ¾” crown staples (smallest box)
- Tape measurer or ruler
- Hand sanding block (220 grit-approximately)
- Pencil
- Bar clamp (optional)
- Surface protector (construction paper)
- Air compressor
- Air-nailer
Cooling Rack Video Tutorial
Directions and Cut Sheets Using Home Depot Lumber
- Remove stickers (refrain from chemicals-food may be touching the wood)
- Measure a 24” mark on just one 36” board (they will be cut altogether as one using one tick mark)
- Clamp (6) boards together (optional-but recommended)
- Cut (6) 36” boards into (6) 24” lengths
- Approximately (3 of the 6) 12” lengths of “waste or cutoffs” will become the bottom cleats
- **(3) 12” lengths will not be used for this rack and will be leftover for other projects
Assembling the Cooling Rack-2 Outside Cleats
- Put the right side (pretty-side) down on the work surface
- Use a straight-edge board as a guide
- Make a 2” tick mark in from the outer edge of boards #1 and #6
- These are where the cleats are going
- Apply a bead of glue on the ends of cleats on both boards #1 and #6
- Put 2 staples in on the cleats on both boards #1 and #6
- Remove the frame
Assembling the Cooling Rack-Center Cleat
- Using the frame as a guide, draw a light pencil line down the center of each where the cleat will be glued on boards 2 through 5
- Apply a bead of glue on the center mark
- Clean up excess with a damp, not but a soaking-wet paper towel or rag
- Use a straight-edge board as a guide
- Space boards 2 through 5 out evenly
- Put the frame back on
- You may have to stop and reposition the boards, ensure your edge guide is straight
- Draw a “glue line” 12” from the edge, draw straight down with a pencil
- Apply a bead of glue down the center on the pencil line
- Draw 2 tick marks coming in from the outside edge to 11 ¼” in on boards #1 and #6
- Position the cleat on the 11 ¼” tick marks
- Ensure the ends of the cleats are flush with the slats on the outside edges
- Put 2 staples in each of the boards 1-6 on the center cleat
Finishing and Sanding the Cooling Rack
- Date and write your name on it
- Sand any rough edges
- Clean up any excess glue
- No need to seal it (it is not recommended to seal this since it will be used for food)
Individual Pot Rack 12”x12” with Power Tools
- This project will be using Home Depot lumber and power tools
- **Plan ahead: if you want to build the single pot rack then you will need to purchase extra boards as listed below:
- (2) ½” thick by 1 ½” wide and 36” long poplar
- You will be able to use the (2 of the 3) leftovers above for the cleats (leaving only 1 for waste)
- You will need a total of (8) ½” thick by 1 ½” wide and 12” long poplar
- (6) for the top and (2) for the cleats
- A center cleat will not be used
Complete the project as above, you will only be using (2 cleats) for the Home Depot pot rack
Come in the width of one cleat board (1 ½” from the edge versus 2”) as in the larger cooling rack. Continue the process all the way through to the finish.
How to Care for the Cooling Racks
It is best not to ruin the wood by using boiling hot water or letting the rack sit in water. I find it easier to either let the food dry to a hard crust and then scrape it off. Or, run semi-hot water over the food and wiping the rack immediately. If you are using the rack with wool or felt, try and not get that wet. I hang my rack on the porch to dry before putting it away.
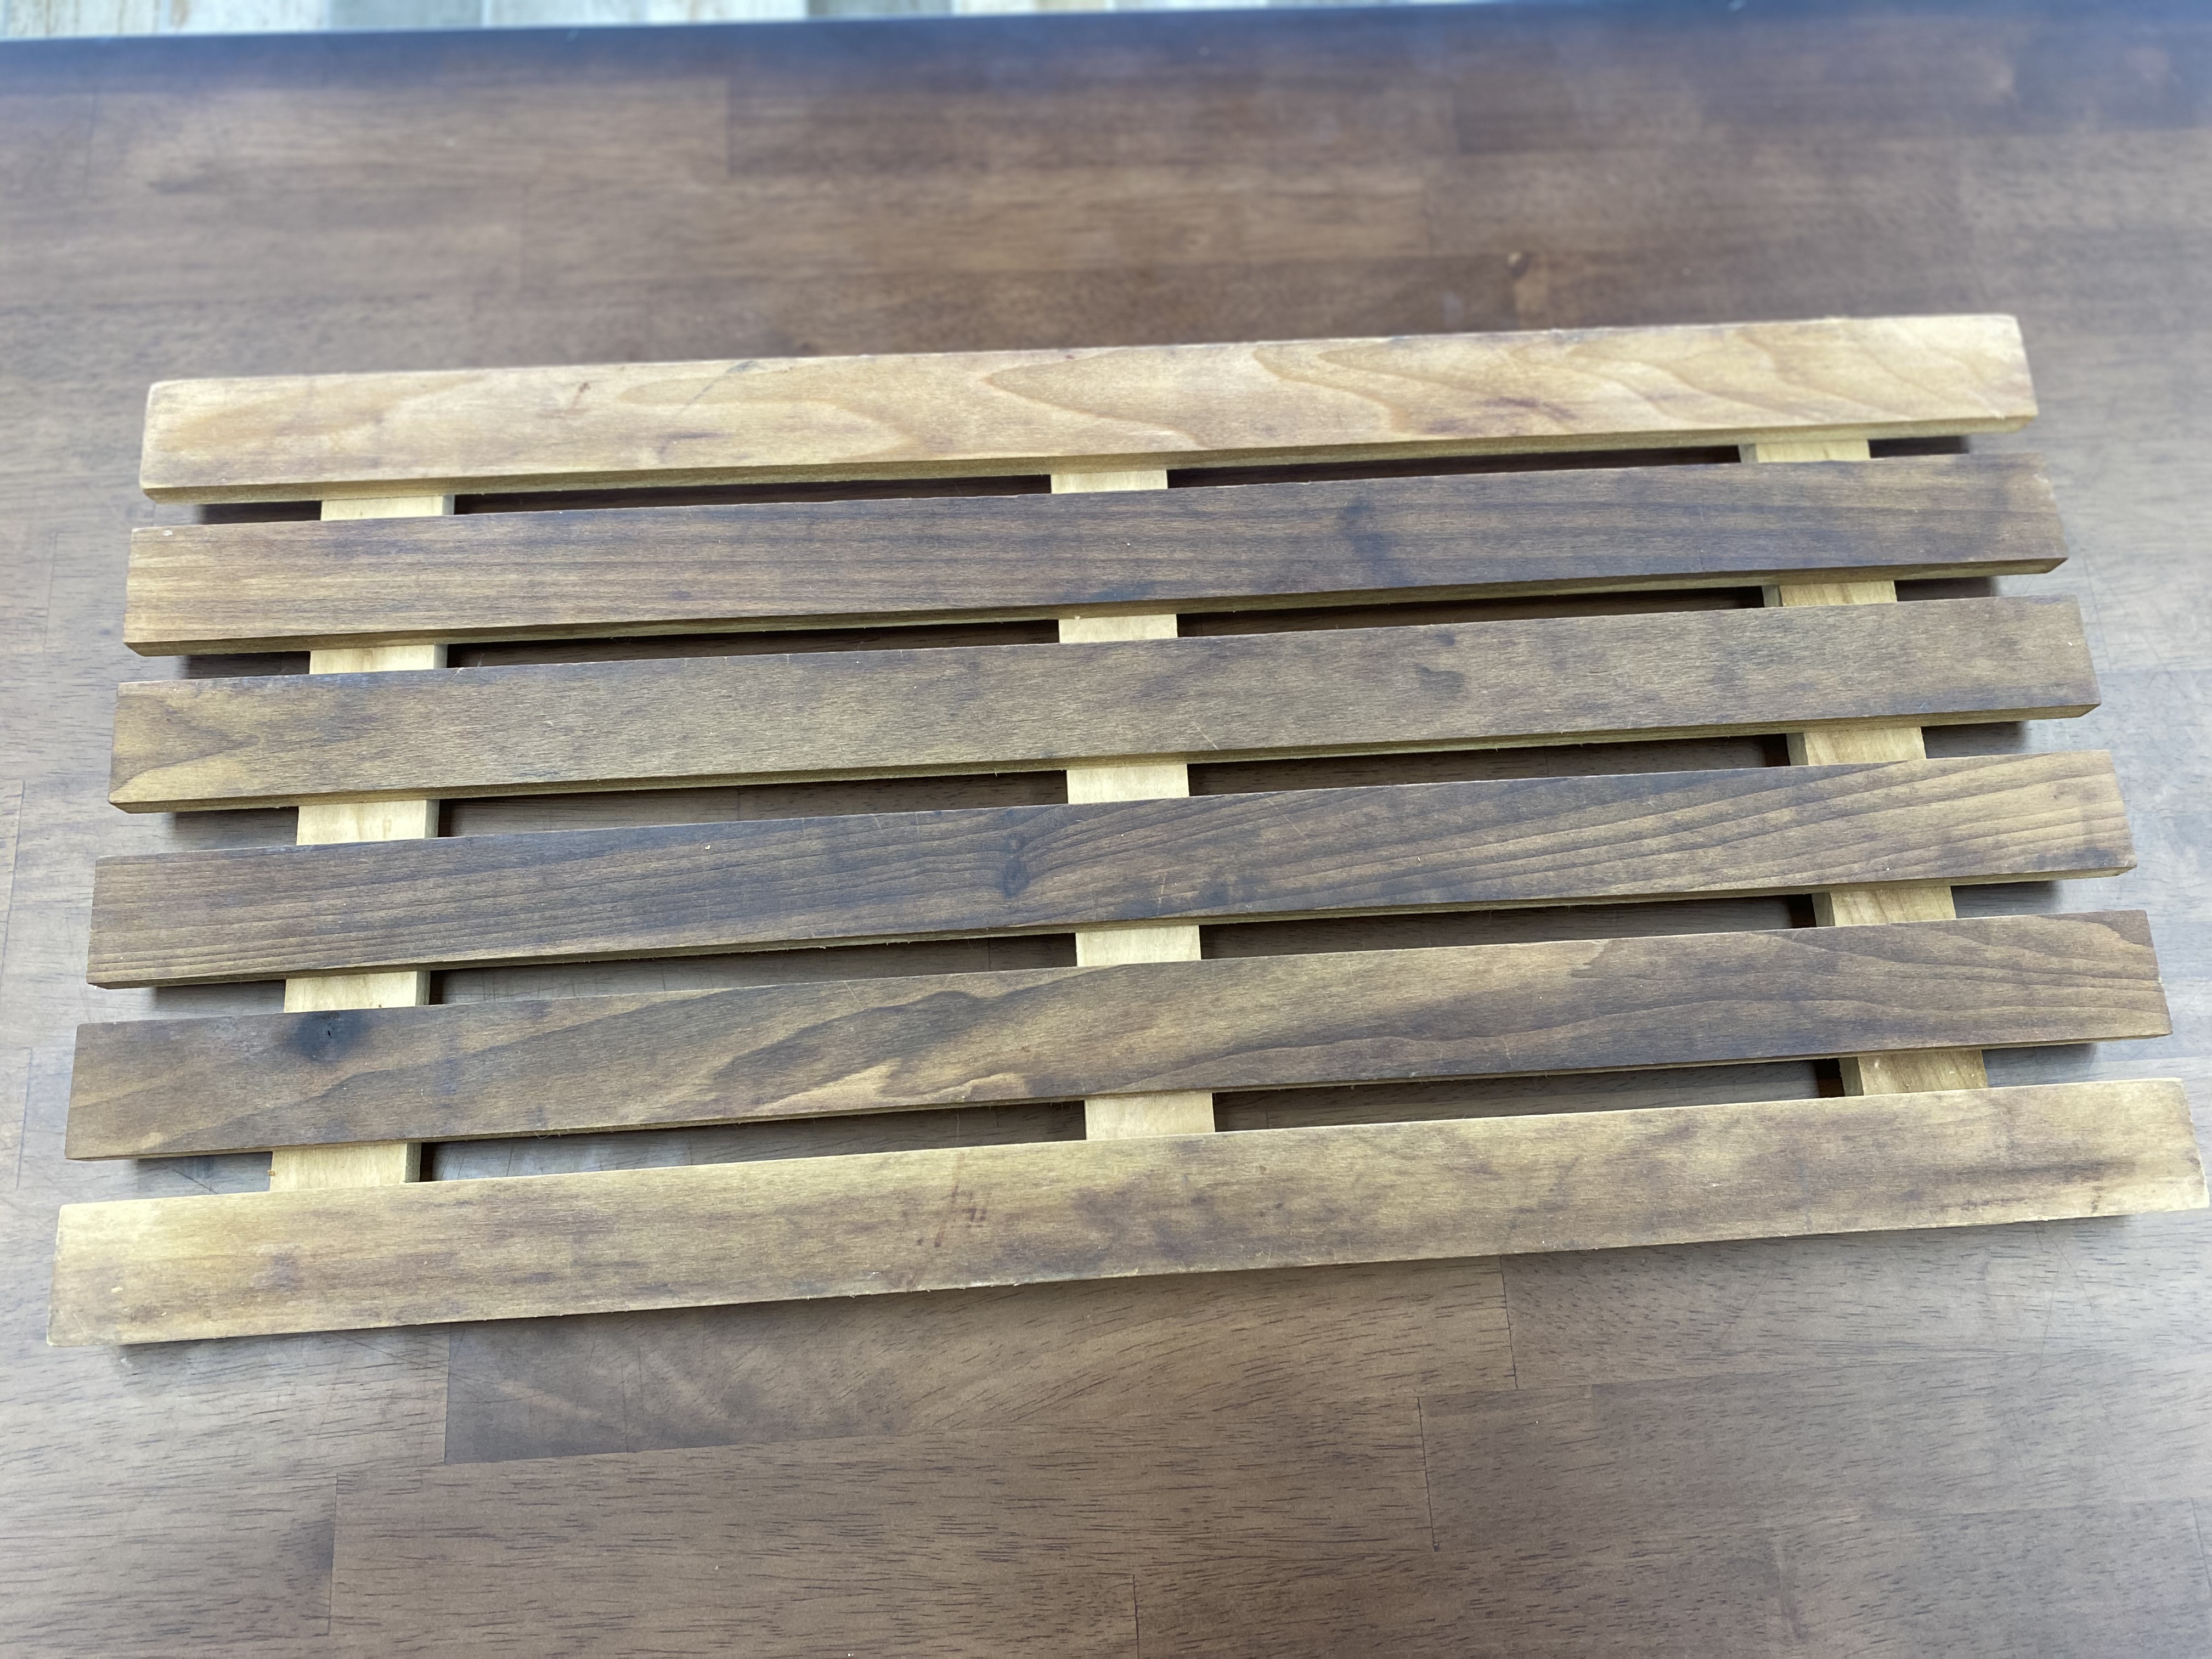
Project #2 Cooling Rack Without Power Tools
For this project, we did not use any power tools and we purchased the poplar from Lowes. We had the lumber department make the necessary cuts on the poplar. At Lowes, the poplar comes in 24” or 48” lengths.
Materials List for the Cooling Rack
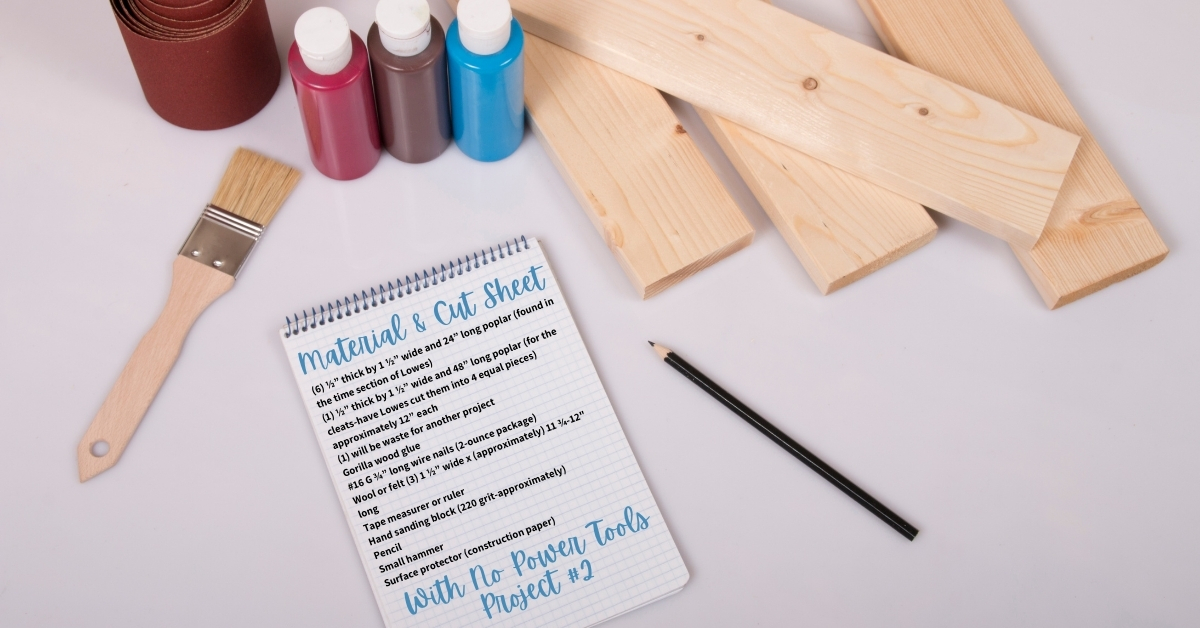
- (6) ½” thick by 1 ½” wide and 24” long poplar (found in the time section of Lowes)
- (1) ½” thick by 1 ½” wide and 48” long poplar (for the cleats-have Lowes cut them into 4 equal pieces) approximately 12” each
- (1) will be waste for another project
- Gorilla wood glue
- #16 G ¾” long wire nails (2-ounce package)
- Wool or felt (3) 1 ½” wide x (approximately) 11 ¾-12″ long
- Tape measurer or ruler
- Hand sanding block (220 grit-approximately)
- Pencil
- Small hammer
- Surface protector (construction paper)
Directions and Cut Sheets Using Lowe’s Lumber
- Remove stickers (refrain from chemicals-food may be touching the wood)
- Sand any rough edges
- Surface protector (construction paper)
Assembling the Cooling Rack-2 Outside Cleats
- Put the right side (pretty-side) down on the work surface
- Use a straight-edge board as a guide
- Make a 2” tick mark in from the other edge of boards #1 and #6
- For this project, I put the cleat on the 2” tick mark and drew a “glue line” towards the inner edge (optional) down all the boards
- These are where the cleats are going
- Apply a bead of glue between the tick mark and the pencil line on both boards #1 and #6 “glue line” drawn with the pencil
- Use a straight-edge board as a guide
- Put 2 nails in on the cleats on boards #1 and #6
- Remove the frame
- Put an arrow which side the cleats goes on (away from the center and towards the outside edges)
- Apply a bead of glue on the center mark
- Clean up excess with a damp, not but a soaking-wet paper towel or rag
Assembling the Cooling Rack-Center Cleat
- Use a straight-edge board as a guide
- Space boards 2 through 5 out evenly using a cleat as guide measurement (approximately 12” in length)
- Put the frame back on
- You may have to stop and reposition the boards, ensure your edge guide is straight
- Draw a “glue line” 12” from the edge, draw straight down with a pencil
- Apply a bead of glue down the center on the pencil line
- Draw 2 tick marks coming in from the outside edge to 11 ¼” in on boards #1 and #6
- Position the cleat on the 11 ¼” tick marks
- Ensure the ends of the cleats are flush with the slats on the outside edges
- Put 2 nails in each of the boards 1-6 on the center cleat
Individual Pot Rack 12″x12″ without Power Tools
- Plan ahead: if you want to build the single pot rack then you will need to purchase
- (4) ½” thick by 1 ½” wide and 24” long poplar (have Lowes cut them in half)
- You will need a total of (8) ½” thick by 1 ½” wide and 12” long poplar
- (6) for the top and (2) for the cleats
- A center cleat will not be used
Complete the project starting with spacing, gluing, and nailing the cleats on, you will only be using (2) for the Lowe’s pot rack.
Come in the width of one cleat board (1 ½” from the edge versus 2”) as in the larger cooling rack. Continue the process all the way through to the finish.
Finishing and Sanding the Cooling Rack
Here is one we made over 8 years ago and it has never failed us!
- Date and write your name on it
- Sand any rough edges
- Clean up any excess glue
- No need to seal it (it is not recommended to seal this since it will be used for food)
Mini-Series Blogs and Videos
Part 1: 2 Free DIY Cooling Rack this blog post
Part 2: How to Make Homemade Raw Milk Butter
Part 3: How to Make Buttermilk DIY
Part 4: Cacao Recipes with Whipped Cream
Part 5: Moonshine Vanilla Extract
Part 6: Jams With and Without Pectin
Part 7: Pound Cake
Shop Here
We are a participant with the Amazon Services LLC Associates Program, an affiliate advertising program designed to provide a means for us to earn fees by linking to Amazon.com and affiliated sites.
You will not incur extra fees or charges for using the links. We only recommend items we believe in and have tried. If I personally make or sell an item, I will mention this in the post for each item.
Click on the Bar of Dish Soap to Visit Our Amazon Storefront!
Pingback: 1 Bowl-Eggless Chocolate Cake-Super Moist! ⋆ Farmhouse-bc
Thank you so much, I enjoy hearing good feedback and I appreciate you taking your time to watch, read, and comment 🙂
Jersey , me and my son are watching these on YouTube! We love them and he wants to try ( your cooking racks ) thank you so much for sharing with us all ! We love ya ! 🙂
Pingback: Super Easy Moonshine Extracts-4 Recipes Provided ⋆ Farmhouse-bc
Pingback: Buttermilk DIY ⋆ Farmhouse-bc
Pingback: Easy jams with and without pectin ⋆ Farmhouse-bc
Pingback: 17 dessert ideas for the holidays ⋆ Farmhouse-bc
Pingback: The Best Ideas for Diy Cooling Rack - Home, Family, Style and Art Ideas
Pingback: Corn Chow Chow Relish - Farmhouse-bc
Pingback: How to make a Himalayan salt lamp - Farmhouse-bc
Pingback: Freezer applesauce recipe - Farmhouse Basic Collection.
Pingback: Apple Pie Jam - Farmhouse Basic Collection.
Pingback: Carrot cake with dehydrated carrots - Farmhouse Basic Collection.
Pingback: Super moist pound cake from scratch - Farmhouse Basic Collection.
Pingback: Easy buttermilk wheat bread machine rolls - Farmhouse Basic Collection.
Pingback: Cacao mousse recipes with whipped cream - Farmhouse Basic Collection.
This looks really nice!
Thanks Raymond!
Excellent job